Monday, 8 October 2012

How to disable Windows 2008 Event Tracker.

When Shutdown Event Tracker is enabled, users cannot shut down or restart the computer without providing a reason. If the computer is shut down or restarted unexpectedly, either as a result of power interruption or hardware failure, the first member of the local Users group to log in after the restart is prompted to enter a reason in Shutdown Event Tracker.

Shutdown Event Tracker can be enabled on the local computer by editing the local computer's Group Policy settings.
Membership in the local Administrators group, or equivalent, is the minimum required to complete this procedure.


Here we will discuss, how to disable Shutdown Event Tracker.


step:1

Take Run dialog box.


step:2


Go to administrative templates.

step:3


double click on display Shutdown Event Tracker.


step:4


select disable option and press OK


step:5

take Run dialog box and type the following command.


Click Here to visit our facebook page and like. 


Monday, 1 October 2012

Windows Server 2012 features.


Windows Server 2012, formerly codenamed Windows Server 8, is the current release of Windows Server. It is the server version of Windows 8 and the successor to Windows Server 2008 R2.

features of Windows Server 2012.

1) User interface.

                           
The operating system, like Windows 8, uses the Metro UI unless installed in Server Core mode. Windows PowerShell in this version has over 2300 commandlets, compared with around 200 in Windows Server 2008 R2. There is also command auto-completion.

2) Task Manager  
                             
Windows 8 and Windows Server 2012 include a new version of Windows Task Manager together with the old version. In the new version the tabs are hidden by default showing applications only. In the new Processes tab, the processes are displayed in varying shades of yellow, with darker shades representing heavier resource use.

3) Installation options


Unlike its predecessor, Windows Server 2012 can switch between "Server Core" and the "Server with a GUI" installation options without a full reinstallation. Server Core is now the recommended configuration. There is also a new third installation option that allows some GUI programs such as MMC and Server Manager to run, but without Internet Explorer, Windows Explorer or the new desktop and shell.

4) IP address management (IPAM)


Windows Server 2012 has an IPAM role for discovering, monitoring, auditing, and managing the IP address space used on a corporate network. IPAM provides for administration and monitoring of servers running Dynamic Host Configuration Protocol (DHCP) and Domain Name Service (DNS). IPAM includes components for:
  a) Custom IP address space display, reporting, and management.
  b) Audit of server configuration changes and tracking of IP address usage.
  c) Monitoring and management of DHCP and DNS services.

5) Active Directory

                              
Windows Server 2012 has a number of changes to Active Directory from the version shipped with Windows Server 2008 R2. The Active Directory Domain Services installation wizard has been replaced by a new section in Server Manager, and the Active Directory Administrative Center has been enhanced. A GUI has been added to the Active Directory Recycle Bin. Password policies can differ more easily within the same domain. Active Directory in Windows Server 2012 is now aware of any changes resulting from virtualization, and virtualized domain controllers can be safely cloned. Upgrades of the domain functional level to Windows Server 2012 are simplified; it can be performed entirely in Server Manager. Active Directory Federation Services is no longer required to be downloaded when installed as a role, and claims which can be used by the Active Directory Federation Services have been introduced into the Kerberos token. Windows Powershell commands used by Active Directory Administrative Center can be viewed in a "Powershell History Viewer".

6) Hyper-V


Windows Server 2012, along with Windows 8, includes a new version of Hyper-V, as presented at the Microsoft Build Event. Many new features have been added to Hyper-V, including network virtualization, multi-tenancy, storage resource pools, cross-premise connectivity, and cloud backup. Additionally, many of the former restrictions on resource consumption have been greatly lifted. Each virtual machine in this version of Hyper-V can access up to 64 virtual processors, up to 512 gigabytes of random-access memory, and up to 64 terabytes of virtual disk space per virtual hard disk (using a new .vhdx format). Up to 1024 virtual machines can be active per host, and up to 4000 can be active per failover cluster. The version of Hyper-V shipped with the client version of Windows 8 requires a processor that supports SLAT and for SLAT to be turned on, while the version in Windows Server 2012 only requires it if the RemoteFX role is installed.

7) IIS 8.0

                           
Windows Server 2012 includes version 8.0 of Internet Information Services (IIS). The new version contains new features such as CPU usage caps for particular websites.


Monday, 10 September 2012

How to Insert an Image Inline in Gmail


  • Make sure rich text editing is turned on in the Gmail message you are composing and Insert images is enabled.
    • If you see a Rich formatting » link above your message's text editor, click it.
    • See below for turning on image insertion.
  • Drag and drop the image from its folder to the desired position in the message.
    • In Google Chrome, you can also paste the image at the desired location in the email from the clipboard using Control-V (Windows, Linux) or Command-V (Mac).
    To use an image you found on the web, or to upload from your computer if dragging and dropping does not work:
    • Position the text cursor where you want the image to appear.
    • Click the Insert Image button in the message's formatting toolbar.
    • To upload an image from your computer:
      • Make sure My Computer is selected.
      • Click Choose File and open the desired graphic.
      • You can click Choose File again to add another image while others are already uploading in the background.
      • Make sure the desired image is highlighted.
    • To use an image located on the web:
      • Make sure Web address (URL) is selected.
      • Enter the image's URL under Image URL.
    • Click Add Image.
    Images you have uploaded from your computer remain available in the Insert Image dialog while you compose the message (but not for other emails).
    After insertion, you can resize and move images easily.

    Monday, 3 September 2012

    Advantages of NTFS over FAT filesystem.

    NTFS is New Technology File System , which has several advantages over the old one FAT.Some of them are the following.

    1) Security

    FAT32 provides very little security. A user with access to a drive using FAT32 has access to the files on that drive.
    NTFS allows the use of NTFS Permissions. It's much more difficult to implement, but folder and file access can be controlled individually, down to an an extreme degree if necessary. The down side of using NTFS Permissions is the chance for error and screwing up the system is greatly magnified.
    2) Compatibility

    NTFS volumes are not recognized by Windows 95/98/Me. This is only a concern when the system is set up for dual or multi-booting. FAT32 must be be used for any drives that must be accessed when the computer is booted from Windows 95/98 or Windows Me.
    FAT and FAT32 volumes can be converted to NTFS volumes. NTFS cannot be converted to FAT32 without reformatting.
    3) Space Efficiency

    NTFS supports disk quotas, allowing you to control the amount of disk usage on a per user basis.
    NTFS supports file compression. FAT32 does not.

    4) Reliability


    FAT32 drives are much more susceptible to disk errors.
    NTFS volumes have the ability to recover from errors more readily than similar FAT32 volumes.
    Log files are created under NTFS which can be used for automatic file system repairs.
    NTFS supports dynamic cluster remapping for bad sectors and prevent them from being used in the future.

    How to check that your drive is NTFS?

    1) Start--->Computer
    2) Right Click on the drive to check
    3) Take properties. There you can see "filesystem: NTFS". It shows that your drive is formatted with NTFS.

    If it is FAT, you can convert into NTFS, without losing your data.That information will be there in the next blog.


    Thursday, 30 August 2012

    10 reasons to buy Windows 7.


    Windows 7 is the current release of Microsoft Windows, a series of operating systems produced by Microsoft for use on personal computers, including home and business desktops, laptops, netbooks, tablet PCs, and media center PCs.

    1) A better desktop. Windows 7 gets you around your PC faster than ever. The taskbar has bigger buttons and full-sized previews—and you can pin programs to it for one-click access. Jump Lists provide shortcuts to files, folders, and websites.


    2) Smarter search. Type in the Start menu search box, and you'll see results instantly, grouped by category—documents, pictures, music, e‑mail, and programs. Search in a folder or library, and you can fine-tune your search with filters like date or file type—and use the preview pane to peek at the contents of your results.


    3) Easy sharing with HomeGroup. Sharing files and printers on your home network should be simple. With HomeGroup, it finally is. Connect two or more PCs runningWindows 7, and with a minimum of fuss you can start sharing music, pictures, videos, and documents with other people in your home.


    4) Built for speed. Windows 7 has key performance improvements to take up less memory and run background services only when you need them. It's designed to run your programs faster and to sleep, resume, and reconnect to wireless networks quicker. And with 64-bit support, you can take full advantage of the latest in powerful 64-bit PCs.


    5) Better wireless networking. Connecting to wireless networks on your laptop—formerly a bit of a hassle—now takes just a couple of clicks. Choose from the list of available networks in the taskbar, click one, and then connect. Once you've connected to a network, Windows will remember it so you can connect again later automatically.


    6) Windows Touch. Use your fingers to browse the web, flip through photos, and open files and folders on a touchscreen PC—for the first time, Windows includes truemultitouch technology. With gestures for zooming, rotating, and even right-clicking, it's a whole new way to work with your PC.


    7) Plays well with devices. Device Stage, a new feature in Windows 7, works like a home page for things like portable music players, smartphones, and printers. When you plug a compatible device into your PC, you'll see a menu with information and popular tasks like battery life, how many photos are ready to be downloaded, and printing options.


    8) Watch, listen, and stream.‌ Internet TV, part of Windows Media Center, gathers programming from sites all over the Internet—shows, sports highlights, video podcasts, and more. Add a TV tuner, and your PC becomes a digital video recorder you can use to watch, pause, and record live TV. And with new features inWindows Media Player 12, you can enjoy your media library around the house—or around town


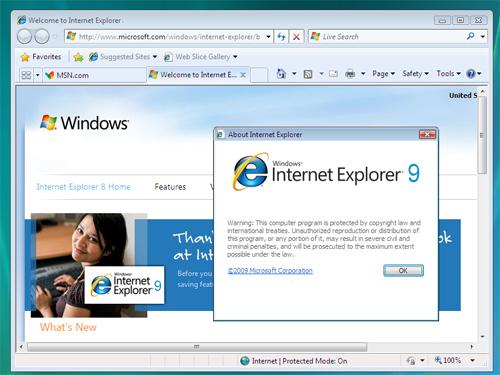
    9) Internet Explorer 9 and Windows Live.‌ Windows 7 unleashes the full power of Internet Explorer 9, from its stunning hardware-accelerated graphics to the ability to launch favorite websites right from your taskbar. You'll also get the many possibilities of Windows Live, free: create photo albums and movies, chat in HD, and share your stuff anytime, anywhere.


    10) Nag-free notifications. Action Center, new in Windows 7, puts you in control of maintenance and security messages. You can turn notifications on or off for things like Windows Defender or User Account Control. If Windows needs your attention, you'll see a notification on the far right of the taskbar. Click it, and you'll get suggested fixes for any problems.


    Note:

    There are totally 6 editions in Windows 7, the above described features may not be available in all editions.

    Monday, 20 August 2012

    ntldr missing.


     Have you seen the error message?
                               

                                http://ramanathan.files.wordpress.com/2007/09/ntldr.jpg

    Before moving ahead we can see, what is ntldr. It is a small program short for NT loader. This program loaded from the hard drive boot sector that displays the Microsoft Windows NT startup menu and helps Microsoft Windows NT/2000/XP load. This portion of the boot sequence was replaced by Bootmgr in Windows Vista and later versions of Windows.

    Why this type error?
    1. Computer is booting from a non-bootable source.
    2. Computer hard drive is not properly setup in CMOS.
    3. Corrupt NTLDR and NTDETECT.COM file.
    4. Misconfiguration with the boot.ini file.
    5. Attempting to upgrade from a Windows 95, 98, or ME computer that is using FAT32.
    6. New hard drive being added.
    7. Corrupt boot sector or master boot record.
    8. Seriously corrupted version of Windows 2000 or Windows XP.
    9. Loose or Faulty IDE/EIDE hard drive cable.
    10. Failing to enable USB keyboard support in the BIOS.
    How to solve it?

    1. Insert the Windows XP bootable CD into the computer.
    2. When prompted to press any key to boot from the CD, press any key.
    3. Once in the Windows XP setup menu press the "R" key to repair Windows.
    4. Log into your Windows installation by pressing the "1" key and pressing enter.
    5. You will then be prompted for your administrator password, enter that password.
    6. Copy the below two files to the root directory of the primary hard drive. In the below example we are copying these files from the CD-ROM drive letter, which in this case is "e." This letter may be different on your computer.

      copy e:\i386\ntldr c:\
      copy e:\i386\ntdetect.com c:\
    7. Once both of these files have been successfully copied, remove the CD from the computer and reboot.

    Sunday, 5 August 2012

    Secure your data in Windows 7.

                                                       Encrypting data in Windows 7

    What is  encryption?
    In cryptography, encryption is the process of transforming information (referred to as plaintext) using an algorithm (called a cipher) to make it unreadable to anyone except those possessing special knowledge.

                                 How to do Encryption in Windows 7


    step-by-step guide for encryption. ( example )

    Scenario:

    There are two user accounts in a computer. One is Administrator account and the other is local user account. The administrator account is used by the MD of the company. He may be leave on next day, due to the reason, he wants to transfer the permission of opening an important file to a local user.

    a) First of all he wants to create data recovery agent ( DRA ).
    b) Secondly he wants to encrypt the file


    steps:

    1) Logon as the administrator ( in our case he is MD )
    2) go to command prompt and type cipher /r:filename.txt  ( you need to provide a password for the file. This time  .cer and .pfx file will be created )
    3) type secpol.msc ->Public Key Policies->Encrypting file System.
    4) right click on it.->select Add Data Recovery Agent.option. Show the security certificate created    previously and choose next option till finish.
    5) Encrypt the file by just right click and taking the properties option.


    Remember that the .pfx file is personal file exchange. This file should be saved in a secure position, because those who get the .pfx file can decrept data.
    6) Give the .pfx file to the local user. (Put the file on the desktop of the local user)
    7) Logon as the local user. Install the .pfx file.Give the password given by the adminstrator.
    8) Now the file is opened.


    Note: the files encrypted before DRA will not be decrepted.