Sunday 29 July 2012

Ncomputing Thin Client


                      M300 3-in-1 Thin Client Kit for Virtual Desktops


 In our previous blog we have seen Ncomputing and their use.( Click Here to see that.) So that here I am going to explain only M300 device.

     
The M300 represents another high performance, low cost computing solution from NComputing
providing a simple, powerful and affordable PC Expansion alternative.


As the industry’s first 3-in-1 thin client offering, the M300 delivers a rich PC experience at 1/3 the cost of PCs and typical thin clients. With this breakthrough, NComputing uniquely delivers innovation that multiplies the value customers can expect from thin clients in a virtual desktop environment.


Features and  Function

1) Up to 45 Users per Host, fewer PC’s to manage and lower computing costs per user
2) Ethernet Connection to the switch provides access to local and inter network (Gigabit port access provides more speed)
3) Numo 2  SoC  provides full screen  video streaming
4) USB Support
5) vSpace Server Simple to install, easy to configure and no complicated hypervisors (nor their annual license fees) to manage,
6) Remote Management  NC Console support for remote (LAN) management & push configurations


who can use it?

1)  Companies with limited number of computers needed can use it ( as it provides 3 client and 1 server)
2) This product support only the following Operating Systems;
       a) Windows 7 (32 and 64 bit)
       b) Windows 2008 R2
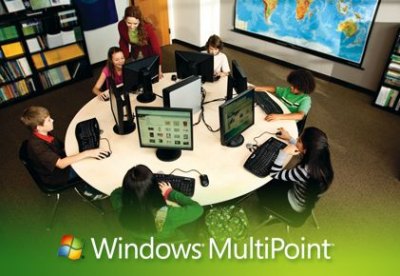
       c) Windows Multipoint Server 2011
   ( In our company we tried all of these software, among them I suggest Windows 2008 R2 in your environment as it provides much performance with  no errors.)
3) It provide compatibility with L series devices ( If L series devices in your company, you can directly connect M 300 devices without any additional configuration)
4) Client can connect with the large device though USB cable. (no need of UTP/STP cable)


for more details contact us

Zion Computer Hardware and Networking Institute
Cochin-16
email :      ho@zionitedu.com
Phone :    04843208466


Tuesday 17 July 2012

How much electricity do computers use?


Do you know, how much power your computer consumes?A typical desktop computer uses about 65 to 250 watts.
If you are interested to check the total power consumed by your computer, you can check through the following website.
    
Click here to check

The power consumed by a system related with what all devices you have in your computer.Such as;
1) Processor
2) RAM (memory)
3) Size of your Hard Disk
4) DVD/CD drive
5) Motherboard
6) Graphic card
7) SMPS
8) Monitor
9) and all other expansion cards

If you are adding any additional card with your computer , system consumes more power.

According to tests conducted by IST, Hardware Support, tests showed the following. On a Pentium 4, 1.7GH machine:
  • during boot power in watts is close to 110w
  • during idle, no power management,. close to 60w
  • during full power saving, no hard disk spin, machine in sleep mode, 35w
                                                                       

Tuesday 10 July 2012

Windows MultiPoint Server 2011


Windows MultiPoint Server is a Windows Server-based operating system using Remote Desktop Services technology to host multiple simultaneous independent computing stations or terminals connected to a single computer.


Windows MultiPoint Server 2011, based on Windows Server 2008 R2 SP1, was released to manufacturing on 10 March 2011. New features in Windows MultiPoint Server 2011 include:
  • The ability to add connect stations and thin clients over the LAN via traditional RDP clients
  • Support for RemoteFX capable thin clients.
  • A shared management console extensibility with Windows Small Business Server 2011 and Windows Home Server 2011.
  • The ability to be backed up by Windows Small Business Server Essentials 2011 (the only server SKU that allows and supports this).
  • Features that allow administrators to view and interact with thumbnails of station desktops, including
    • Projecting a single station's desktop to one or all stations.
    • Locking the keyboard and mouse of station and displaying a message.
    • Remotely opening and/or closing applications.
    • Restricting internet browsing to a specific list of sites or blocking browsing to a specific list of sites.
  • Management of multiple WMS servers and stations from within a single administration console.
  • Support for running within a virtual machine.
  • Distribution through a wider variety of distribution channels for both editions.
There are two editions
1) Windows MultiPoint Server 2011 Standard.
2) Windows MultiPoint Server 2011Premium.

The main difference between Standard and Premium is that, premium has domain join support and 20 client access. But Standard has 10 client access and no domain join support.
 

Tuesday 3 July 2012

Adding or removing a Scanner

                    
In computing, an image scanner—often abbreviated to just scanner—is a device that optically scans images, printed text, handwriting, or an object, and converts it to a digital image


Adding a Scanner to a Computer
Most of the scanners come with USB port.If the scanner has a universal serial bus (USB) connector, you can typically plug it into your computer and Windows 7 will automatically install the driver that your computer needs, as well as any programs provided by the scanner manufacturer. Some scanners, however, might require you to install software before plugging in the USB connector, while others might require you to turn on the scanner before or during the installation process. To make sure that you install the scanner correctly, check the information that came with the scanner.


Removing a Scanner

You must be logged on as an administrator to perform these steps.
To stop using a scanner, you can unplug it from your computer at any time. You don't need to uninstall the driver. If you want to uninstall the driver and any programs that came with the scanner, follow these steps:
  1. Open Device Manager by clicking the Start button Picture of the Start button, clicking Control Panel, clicking System and Maintenance, and then clicking Device Manager. Administrator permission required If you are prompted for an administrator password or confirmation, type the password or provide confirmation.
  2. To see scanners that have been added to the computer, double-click Imaging devices.
  3. Right-click the scanner name, and then click Uninstall.