Thursday 23 July 2015


Configuring Windows Deployment Services over a LAN

               Windows Deployment Services is the updated and redesigned version of Remote Installation Services (RIS). It enables you to deploy Windows operating systems over the network
                You need to have Windows Server 2008 or Windows Server 2003 SP2 to deploy the WDS server. Also, make sure your Active Directory and DNS are up and running. DHCP server should be authorized by Active Directory on your network. Linux DHCP servers do 
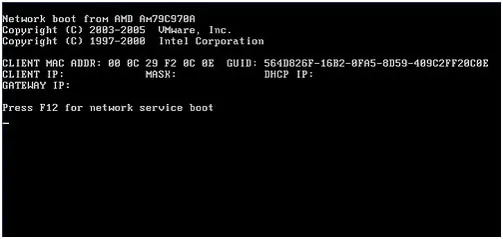
not need to be authorized by AD. On the client side you need NICs to be PXE compliant (almost all network adapters that are available for several years now are PXE compliant).
Step1: First install WDS service. For this Go to roles and add this service. Next click Start, then Administrative Tools, and then click on Windows Deployment Services .
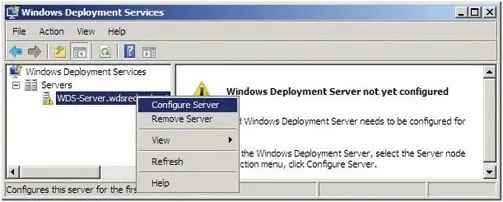
Step 2: Right-click the server, and then click on Configure Server and follow the instructions.
step2
Step3: When the configuration is completed the yellow mark on server is cleared. Now that you have configured the server, you will need to add images. Here you have to give at least two images: one boot image and the other for installation before you are able to boot WDS Server services .

step3
Step 4: To add the Install image
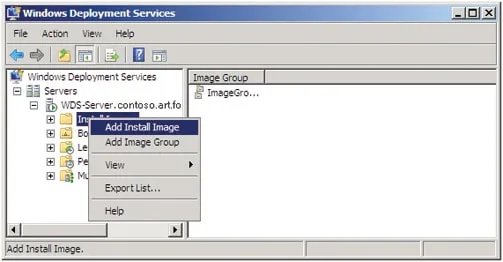
In the Windows Deployment Services MMC snap-in, right-click on the Install Images node, and then click Add Install Image.
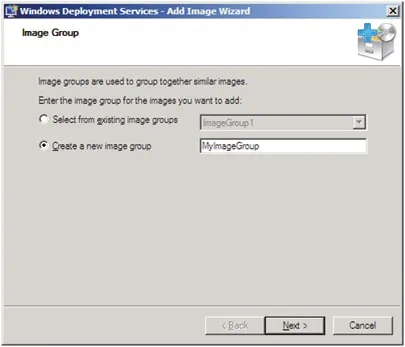
1.    Specify a name for the image group, and then click Next.

step4
2.    Browse to select the default install image (Install.wim), which is located in the \Sources folder of the product DVD, and then click Open. Repeat this procedure to add any additional install images.

step4b
Step 5: To add boot image
1.    Browse to choose the default boot image (Boot.wim) on the product DVD which is located in the \Sources folder. Click Open and then click Next.
step5a
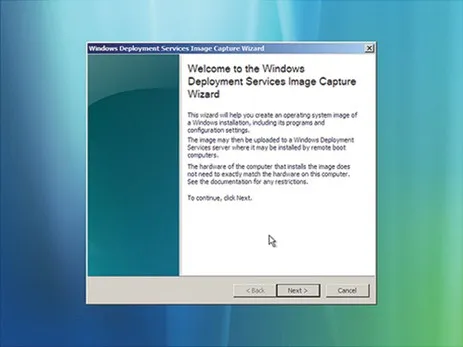
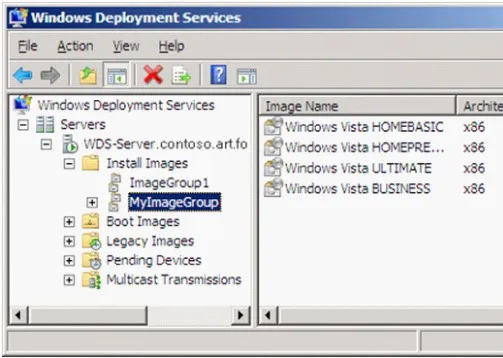
2.    After the above process completes, right click on the image you just added and select “Create Capture Boot Image”.
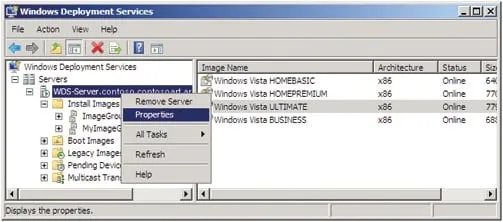
3.    If you want to change any server configuration right click on server and click on properties.
step5b

Step 6: To install an operating system on client side
step5c
Go to BIOS of the client computer and enable PXE booting and set the boot order network first. Restart your computer and press F12 to boot and select network boot. Follow the instructions.Once it boots, it will show the Windows Deployment Service wizard from where you can easily install the boot image.

step5d

Monday 6 July 2015


How to install X2Goserver on Ubuntu 14.04


           X2Go server enables access to the graphical desktop of a computer remotely, even over a low bandwidth connection
X2Go is a Remote Desktop solution which allows you to remotely connect to a PC. It supports all the OS whether it is Linux, Windows or Mac OS X. A key feature is that it even supports sound transmission over remote connections. Multiple users/clients can access a single X2Go Server at the same time, with each user/client having an individual Desktop session. In this case, we are using Ubuntu (server & client) and Windows 7 (client).
X2Go server Installation
Step 1: Install  X2Go server on Ubuntu 14.04 Server.
apt-get update
apt-get install python-software-properties
add-apt-repository ppa:x2go/stable
Step 2: Add PPA repository of x2Go to install x2Go server and client via repository.
sudo apt-add-repository ppa:x2go/stable
sudo apt-get update
sudo apt-get install x2goserver x2goserver-xsession
sudo apt-get install x2golxdebindings  # if you use LXDE/lubuntu
Step 3: Now, install the graphical Desktop environment in the Ubuntu Server. Run the following command and reboot.
apt-get install xfce4
reboot
X2Go connection with Ubuntu Desktop
Step 1: Now, connect the Ubuntu 14.04 server with the X2Go client from Ubuntu 14.04 desktop. Install the X2Go client in the Ubuntu Desktop as follows:
sudo add-apt-repository ppa:x2go/stable
sudo apt-get update
sudo apt-get install x2goclient
 
Step 2: After successful installation of the client, open the X2Go client in the desktop and give the following details:
Session name: New session (any name)
Host : 192.168.5.100 (Your IP)
Login : administrator (or any user on your Ubuntu Server)
SSH port : 22 ( if not altered at Ubuntu Server)
Session type : XFCE ( Graphical environment installed
in server)
Step 4: Now, it will ask for user credentials. In this case, it is user=administrator and password=pcquest. After putting credentials, it will initiate the process of the connection and ask to authenticate the SSH key. Press Yes and press Use default config. You will get the graphical connection with the Ubuntu Server.
Remote Connection with Windows machine
Step 1: To connect with Windows 7 machine first, install the X2Go client in windows machine which is available online in the form of exe file. After the installation, run the X2Go client and give the same details which were given to connect Ubuntu server like IP, Login etc.
step-2
Step2: Put the credentials as user=administrator and password=pcquest which might be different in your case. You will get the remote desktop.
step-3